What do you get when you cross an old pink beanbag chair,

some brown corduroy fabric, a little extra time, and someone who loves to sew?

A new beanbag chair!

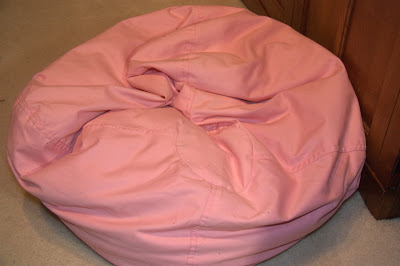
My daughter bought this old beanbag chair at Goodwill, several years ago.
It was a perfect little dumping ground for all of her stuffed animals and laundry she didn’t want to put away reading area. Since we’ve redone her bedroom, and added a desk to the space, there really wasn’t room for the beanbag chair. I didn’t want to get rid of it because we use it when we have lots of kids over or need an extra seat when we’re watching a movie. Since it didn’t really have a home, it kind of moved from place to place. I’d find it in the family room, a corner of the hallway, or sitting on top of my craft table. I’d ask the kids to clean up and I’d never know where I would find it.
Well, a beanbag makeover was on my to-do list for quite a while. The pale pink doesn’t really go with my decor. I had some brown corduroy fabric in my stash and thought it would work well for a DIY beanbag chair. It had been originally purchased to be made into pillows for a couple of chairs in my family room, but I think it’s suited perfectly to become a beanbag. Corduroy is so durable and brown is a perfect color for a kids’ seat. (Some people like white slip covers because they are easy to bleach. I just prefer to hide the dirt in dark brown textured fabric. The truth just came out.)
So how do you make a DIY Beanbag Chair?
I started by trying to trace a pattern.

You can see the seams in a typical beanbag. I tried to flatten out the beanbag the best I could, without taking any of the filling out. Then I just traced the seams and estimated how big I wanted to make it. It was kind of awkward, trying to trace a filled object, but I eyeballed it and it worked out ok. My pink beanbag had four panels, so that’s how many I knew I needed to make. I pinned my pattern to the corduroy and cut four of those pieces.
My next step was the trickiest. I knew I would need to sew it into a tube-like shape, and I knew I couldn’t close the top or bottom all the way. I needed to leave room on the top and bottom to push and pull the old beanbag into place. I took two of my oval-ish shapes, placed them right sides together, and stitched along one side, leaving about 5 inches open on the top and 5 inches open on the bottom. Then I added pieces 3 and 4, in the same way. Once I had a flat panel of four pieces sewn together, I simply completed the tube by sewing piece 4 to piece 1 (right sides together).
At that point I stuffed the old beanbag into the tube. Then all that was left was to hand stitch a circle to the top and a circle to the bottom. This took the most time. I did most of it while I was watching a movie with my hubby and son. I tried to do an extra good job, knowing that kids+jumping+throwing+roughhousing=things falling apart.

I think it turned out pretty decent. It’s nothing fancy, but it’ll do when we’re watching movies and need just one more place to sit. This was one of those projects that was SUPER easy to sew, but took a little thinking and planning to make it happen. Ideally, I would have put a zipper in one side, but I had no desire to drive to the fabric store, so laziness won. No zipper.
Happy sewing (and movie watching)!

The Comments
Rehena Aktar
Wow! This is a very useful page and I really enjoyed reading article and all users’ comments. Looks great and comfortable . That is a wonderful bean bag . I am impressed! Your fabric is much more stylish than what they offer. Best quality bean bag chairs that will blow our mind. Thank you for sharing valuable information.
Jürgen
some brown corduroy fabric, a little extra time, and someone who loves to sew? A new beanbag chair! My daughter bought this old beanbag … bigbeanbagchair.blogspot.com