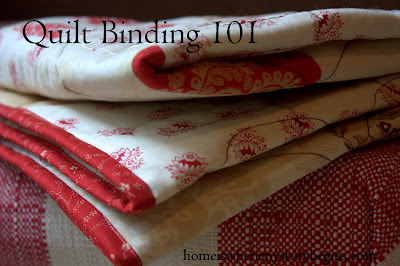
home is where my story begins...

  • Home
  • Baking
  • Sewing
  • Cooking
  • Decorating
  • Garden
  • Featured On
  • Contact Me

Quilt Binding 101

November 25, 2015   By Becca Leave a Comment

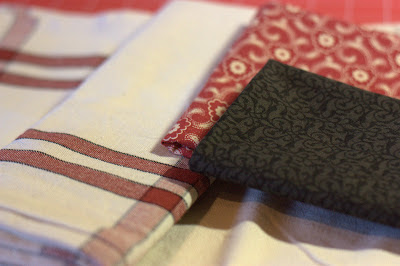
 When I got the urge to start this quilt, the fabric had been sitting on my sewing table for quite a while and I really had no plans for it, so a quilt seemed like a good choice.  I wanted something simple and mindless.  I wasn’t in the mood to think too hard about measurements and fabric placement.  I just wanted to sew.  I came up with a VERY simple quilt top, which I figured I’d try free motion quilting on.  I wasn’t too excited about the free motion quilting part of that idea, so when I finished, the quilt tops sat there for about half of the year.  Finally, I decided it was time to get these quilts out of the craft room and into the family room.  While I was at it, I took pictures of the quilt binding process.

If you’ve ever wanted to learn to bind a quilt, here’s the step by step tutorial.  If you really don’t care, please don’t waste your time reading this, because it’s very picture heavy.

I use 2 1/2 inch strips when I make quilt bindings.  I use a cutting mat, rotary cutter, and quilting ruler to make sure my strips are perfect.


Once the strips are cut, it’s time to join them together.  I place two pieces (right sides together) and sew from corner to corner.  I overlapped a little on the ends of each piece because I knew I’d cut that part off.  You can draw a line to follow if you’d like, but I just eyeball it.


Cut off the extra fabric.

When you open in up, it looks like this.  Press the seams to one side and then keep adding more strips in the same way.

Next, you need to iron your fabric.  In the past I would fold my fabric, wrong sides together, finger press it down, and then iron it.  It’s not hard and it’s not too time consuming, but then I spotted this cool contraption on a quilting show on PBS. (There I go again, admitting that I spend my spare time watching sewing shows on public television. Nerd alert!)  This is a binding maker from Singer.  It is so cool! It folds, presses, and spits out perfect quilt binding in about 2 minutes. 


It comes out of the machine perfectly pressed.  That little piece on the end is the iron. It has a little roller in it so everything is automatic.  If you sew, you know how cool this is!  It even makes piping, although I haven’t tried that yet.  Ok, so if you don’t have this cool machine, just fold the fabric in half and iron.  That’s the way I have made it for the past 15 years and it works just fine. 

Just one more picture of my fun new toy doing its thing.

Ok, maybe just one more.  See how it fold the fabric for you before going into the iron.  You can get that tip in other sizes too.  It’s “sew” much fun!

When you’re done pressing, you’ll have a pile of quilt binding.  Get ready to sew.

The first thing I do is trim my starting edge at an angle.

Then I open it up and fold it back.

When you close the fabric back up, it gives you a clean edge.

To start binding my quilts, I usually don’t start at a corner.  I just pick somewhere in the middle, at the bottom, and line my binding fabric up.  You’ll notice that I have the raw edge of my quilt lined up with the raw edge of my binding fabric. The over hanging fabric is my quilt batting, and you can’t see it but the backing fabric is there too.


Line the presser foot up along the edge of the fabric, backtack a few stitches and then start sewing a straight line.
 

When you get just about to the end, maybe a quarter of an inch away, backstitch about an inch.

Pull the binding fabric back on top of itself, so it folds into a 45 degree angle.

Then, fold it back on top of itself, lining the edge up with the next side you need to sew.

I know that’s kind of tricky.  Let’s try that one more time.  I’m close to the edge.


Backstitch an inch.

Fold.

Fold and line up with the new side.

Then, you can lift your presser foot, turn your quilt, and get ready to sew the next side.
 

When you get to the end, turn the fabric under again, like you did at the beginning.  That gives it a nice clean edge.


Finish sewing the binding down. 

Hey, look at that!  Someone got a pretty new cutting mat!  I really needed a new cutting mat and found this one in red.  I’ve never seen a red cutting mat before, but I’m loving it!

I use my ruler and rotary cutter to remove the extra batting and backing fabric.  I line the quilt ruler up along the edge of the binding fabric and cut.  This still leaves that 1/4 inch seam allowance.  Don’t cut that off, because it’s what makes the binding fluffly.

When you’re done trimming, the quilt will look like this.


Flip the quilt to the back side, roll the fabric around the edge and pin.  I really hate pinning, so I only do it when I really have to.  The first couple of times you bind a quilt, you’ll want to pin.  After that, just hold it with your fingers and go for it.

When you are sewing the binding down, you want to get REALLY close to the edge.  See how my needle is right next to the edge of the binding fabric.  I want to go right along that edge.  It takes some practice.
 

When you get to a corner, you’ll need to fold the fabric.


It makes a nice mitered corner. When you get to the point, put the needle down into the fabric, and turn the quilt so you can keep sewing.

Keep going all the way around the quilt.

Here’s my finished quilt.  I can’t say I’m in love with it.  I love the fabrics, but I’m a little bored with the finished product.  

I did get to try my hand at machine quilting.  I made the swirly patterns in the big squares, which is something I’ve never done before.

I made two of these quilts and put them over the chairs in my family room.  They add a little color and I’m happy about that.  If you’re working on a quilt of your own, I’d love to see it.  You can email me a picture at homeiswheremystorybegins@gmail.com.

Happy quilting!

Posted by Picasa
Dolen Diaries
Nap-Time Creations

Share this:

  • Click to share on Facebook (Opens in new window)
  • Click to share on Twitter (Opens in new window)
  • Click to share on Pinterest (Opens in new window)
  • Click to share on Google+ (Opens in new window)

Filed Under: Miscellaneous, Sewing Tagged With: Fabric, quilting, quilts, tutorial

Sewing With Organic Fabric – Pillowcase Tutorial

February 1, 2014   By Becca 1 Comment

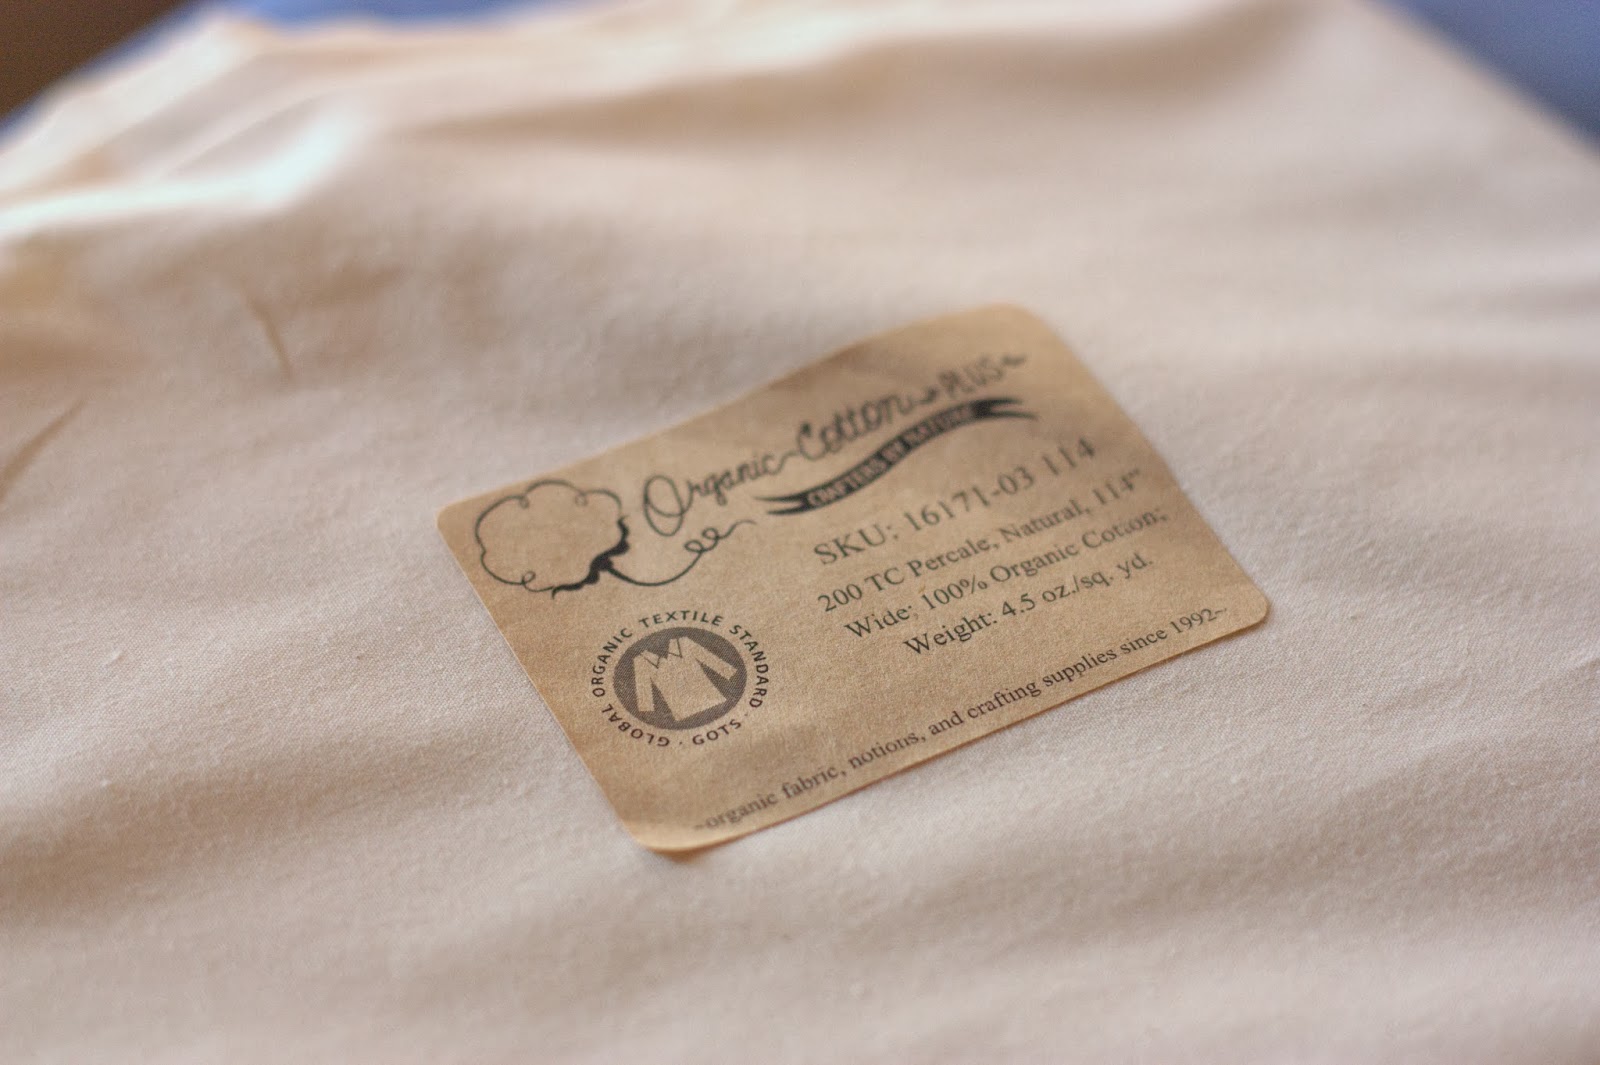
About a month ago I received an email from the nice people from Organic Cotton Plus. They asked if I would be interested in doing a review of their fabric.  Now, you know that I really love to sew, but I wasn’t sure I wanted to use my blog as a place to simply review products.  I love telling my friends/readers about products I love, but I wasn’t so sure about sponsored blog posts. I’ve done a few, here and there, but I want to be choosy about the companies I align with.  Right about the time I was “sitting” on that email and just thinking about whether I was interested, I started planning my pillowcase sewing projects.  At the same time, I was watching Dr. Oz and the guests were talking about all of the horrible toxins that are in our furniture, bedding, blankets, etc.  As I was watching, I was thinking to myself, “It’s too bad all sheets aren’t made from organic fabrics.”  My mind wandered away from Dr. Oz, and I grabbed my iPad to check out that Organic Cotton Plus website.  I emailed the company and told them that I would, indeed, be interested in doing a review and asked for suggestions on pillowcase fabrics.  A nice 200 thread count percale was suggested, and a few clicks later, my order was being processed.
They sent me a few yards, from a percale that is sold in an extra wide width.  More fabric for me to play with!
The fabric that arrived looked slightly darker than I thought it looked in the online photo, but it was still a perfect neutral. I could have just been their lighting vs. my lighting.  I believe the color I chose was called Natural and I’d say it’s exactly that.  If you sew with Warm and Natural batting, the color was quite close to that.  It was a very smooth, slightly stiff fabric.  It was exactly what I would expect from a 200 thread count percale.  Do you know how you can feel the difference between quilting fabric and sheets?  Well, that’s kind of what I’m trying to describe. New sheets just feel kind of stiff, but in a “my grandma probably would have ironed these” type way.
My hubby (bless his heart) bought me a mini-jellyroll for Christmas.  He was looking for something to put in my stocking, so he went into Jo-Ann’s and found a jellyroll he thought I’d like.  He’s a keeper.
After setting the jellyroll on top of my organic Natural fabric, I knew it was a good match.  Now, you may be wondering why I was so quick to add non-organic fabric to my organic pillowcases.  Knowing that I would just be using the jellyroll on the edge, I figured it would be ok. The main part that you put your head on would be organic. Also, I kind of wanted to sew with this fabric before jumping in and buying anything from the Organic Cotton Plus website.  My fear was that I’d notice a bunch of imperfections from my organic fabric.  I really had no idea what to expect.  This is the first time I’ve ordered fabric online before.  
By the way, there were no imperfections in the fabric.  It was actually quite impressive and I really enjoyed sewing with it.
When I opened the jellyroll, I had to decide which order to sew the strips into.  I was making this pillowcase for my son’s room, which is gray, tan, khaki, and heavy on the blah-ish colors. The jellyroll fabrics were really perfect for his room.  They were boyish and just the right tones.
I sewed the fabric strips together with a quarter inch seam. Then I pressed the strips toward the darkest layer.
Next, I cut 9 inch strips across the strips I had just sewn together. This whole strip needs to be 9×44-ish, when cut.
The main fabric for the pillowcase needs to be 27.5″x44″.  Lots of times, when you buy fabric, it comes in 44″ widths.  This fabric was extra wide, so I had to cut it down a bit.  I’ve learned that when you’re working with lots of fabric, the “snip and rip” method works very well.  I straightened up the edge, measured down 27.5 inches, made a little snip in the fabric, and then ripped it all the way down.  The fabric will rip right on the grain.  It makes it so much easier to work with and you don’t have to cut through all of the bulk. I use this same method when working with vintage sheets. 
I also cut a 3 x 44 inch strip of gray, just to use as an accent color.  I folded it in half and pressed it.  (Kind of like making quilt binding.)
The next few steps will kind of make your head spin, if you’ve never done this before.  
Lay the jellyroll strip so that it’s right side up.  Lay the accent piece on top of that, and then the pillowcase fabric on top of that.  The picture below show this step in process.  See the three layers?  I just haven’t lined them all up yet in this photo.

This one shows them all lined up.  Don’t worry if your edges don’t match up.  You’ll trim those off later.
At this time, I pinned those pieces together, just because I didn’t have much table space to work on.  You don’t actually need to pin here, because you’ll just be taking these pins out after you roll it.  It’s your choice. Then you start rolling the pillowcase fabric. Stop rolling a few inches from the top.  Don’t roll the jellyroll fabric up yet.  That step comes next.

Once you get the pillowcase rolled up, you fold the jellyroll fabric over the top of the little roll.  Then pin it.  The goal here is to sew the layers together without sewing that roll into it.  One layer is sewn in, but not the whole roll.

Sew up the edge.
See how it looks when it’s all sewn up.  This is why they call it a burrito pillowcase, because it’s wrapped up like a little burrito.

Then you need to turn this little burrito right side out.

See how it looks now?  You have the jellyroll fabric, the accent fabric, and the body of the pillowcase.  

All of the seams are hidden inside and it looks neat and tidy.
At this stage, I started thinking about all of the ironing I would need to do each time I washed the pillowcase.  I decided to put a little stay stitching along the edge.  I did it about an eighth of an inch away from the original seam. 

Here’s another tricky part.  It’s time for the french seam.  You now have three open edges of the pillowcase.  One of the edges will stay open because you are putting the pillow in that way.  So, for the french seam, you sew wrong sides together.  It’s opposite of how you do most sewing.  The pretty sides are out. Then, you will flip it wrong side out and sew up that same edge again.  The first time I use a quarter inch seam and for the second run down, I use an almost-half-inch seam for this. This totally encloses the raw edge and you will never have little threads coming out.  I had to watch a few YouTube videos on French Seams before this step made sense.  You need to do French Seams on the open side and the bottom.  Then, you’re done! 

One last press and it’s all ready to go into my son’s rooms.  I made two of these pillowcases because he has a bigger bed now.  
In case you missed them, here are the girly pillowcases I made last week.  They are a lot more “sugar and spice” and a lot less “Duck Dynasty” but they both fit my kids’ room styles.

The girly pillowcases were not made with the organic fabric from Organic Cotton Plus.  I just thought I’d throw those in to show you a few examples of cute pillowcases.
Tomorrow’s post will be about why we should bother sewing with organic fabric. The nice people at Organic Cotton Plus shared a few links with me and I’ve learned some new things! 
Happy sewing, Friends!

Share this:

  • Click to share on Facebook (Opens in new window)
  • Click to share on Twitter (Opens in new window)
  • Click to share on Pinterest (Opens in new window)
  • Click to share on Google+ (Opens in new window)

Filed Under: Miscellaneous, Sewing Tagged With: products, tutorial

Ruffled Kitchen Towels – A quick kitchen update

February 9, 2013   By Becca 2 Comments

Oh, what to do with a few pre-made kitchen towels and some fabric scraps.  That was my dilemma.

Time for a few ruffled kitchen towels!  (No, I didn’t bother to iron the towels!)

I started by finishing the edges of the fabric I wanted to use as my ruffle.  I just folded over the smallest amount that I could.

Then, I used my favorite sewing toy ever! My ruffler foot is “sew” much fun!

Once the ruffle was attached to the towel,  all that was left was adding the band.

I finished the edges of the black fabric band.

I stitched it right over the top of the ruffle.

All done!

The only problem is that no one will dry their hands on them.  I think they’re just too cute to use!

Happy sewing!

Posted by Picasa

Share this:

  • Click to share on Facebook (Opens in new window)
  • Click to share on Twitter (Opens in new window)
  • Click to share on Pinterest (Opens in new window)
  • Click to share on Google+ (Opens in new window)

Filed Under: Miscellaneous, Sewing Tagged With: tutorial

Quilt Binding 101

July 31, 2012   By Becca 4 Comments

Last winter, when we were snowed in for a few days, I decided to get to work on a quilt.  The fabric had been sitting on my sewing table for quite a while and I really had no plans for it, so a quilt seemed like a good choice.  I wanted something simple and mindless.  I wasn’t in the mood to think too hard about measurements and fabric placement.  I just wanted to sew.  I came up with a VERY simple quilt top, which I figured I’d try free motion quilting on.  I wasn’t too excited about the free motion quilting part of that idea, so the quilt tops sat there for about half of the year.  Last week I decided it was time to get these quilts out of the craft room and into the family room.  While I was at it, I took pictures of the quilt binding process.

If you’ve ever wanted to learn to bind a quilt, here’s the step by step tutorial.  If you really don’t care, please don’t waste your time reading this, because it’s very picture heavy.

I use 2 1/2 inch strips when I make quilt bindings.  I use a cutting mat, rotary cutter, and quilting ruler to make sure my strips are perfect.


Once the strips are cut, it’s time to join them together.  I place two pieces (right sides together) and sew from corner to corner.  I overlapped a little on the ends of each piece because I knew I’d cut that part off.  You can draw a line to follow if you’d like, but I just eyeball it.


Cut off the extra fabric.

When you open in up, it looks like this.  Press the seams to one side and then keep adding more strips in the same way.

Next, you need to iron your fabric.  In the past I would fold my fabric, wrong sides together, finger press it down, and then iron it.  It’s not hard and it’s not too time consuming, but then I spotted this cool contraption on a quilting show on PBS. (There I go again, admitting that I spend my spare time watching sewing shows on public television. Nerd alert!)  This is a binding maker from Singer.  It is so cool! It folds, presses, and spits out perfect quilt binding in about 2 minutes. 


It comes out of the machine perfectly pressed.  That little piece on the end is the iron. It has a little roller in it so everything is automatic.  If you sew, you know how cool this is!  It even makes piping, although I haven’t tried that yet.  Ok, so if you don’t have this cool machine, just fold the fabric in half and iron.  That’s the way I have made it for the past 15 years and it works just fine. 

Just one more picture of my fun new toy doing its thing.

Ok, maybe just one more.  See how it fold the fabric for you before going into the iron.  You can get that tip in other sizes too.  It’s “sew” much fun!

When you’re done pressing, you’ll have a pile of quilt binding.  Get ready to sew.

The first thing I do is trim my starting edge at an angle.

Then I open it up and fold it back.

When you close the fabric back up, it gives you a clean edge.

To start binding my quilts, I usually don’t start at a corner.  I just pick somewhere in the middle, at the bottom, and line my binding fabric up.  You’ll notice that I have the raw edge of my quilt lined up with the raw edge of my binding fabric. The over hanging fabric is my quilt batting, and you can’t see it but the backing fabric is there too.


Line the presser foot up along the edge of the fabric, backtack a few stitches and then start sewing a straight line.
 

When you get just about to the end, maybe a quarter of an inch away, backstitch about an inch.

Pull the binding fabric back on top of itself, so it folds into a 45 degree angle.

Then, fold it back on top of itself, lining the edge up with the next side you need to sew.

I know that’s kind of tricky.  Let’s try that one more time.  I’m close to the edge.


Backstitch an inch.

Fold.

Fold and line up with the new side.

Then, you can lift your presser foot, turn your quilt, and get ready to sew the next side.
 

When you get to the end, turn the fabric under again, like you did at the beginning.  That gives it a nice clean edge.


Finish sewing the binding down. 

Hey, look at that!  Someone got a pretty new cutting mat!  I really needed a new cutting mat and found this one in red.  I’ve never seen a red cutting mat before, but I’m loving it!

I use my ruler and rotary cutter to remove the extra batting and backing fabric.  I line the quilt ruler up along the edge of the binding fabric and cut.  This still leaves that 1/4 inch seam allowance.  Don’t cut that off, because it’s what makes the binding fluffly.

When you’re done trimming, the quilt will look like this.


Flip the quilt to the back side, roll the fabric around the edge and pin.  I really hate pinning, so I only do it when I really have to.  The first couple of times you bind a quilt, you’ll want to pin.  After that, just hold it with your fingers and go for it.

When you are sewing the binding down, you want to get REALLY close to the edge.  See how my needle is right next to the edge of the binding fabric.  I want to go right along that edge.  It takes some practice.
 

When you get to a corner, you’ll need to fold the fabric.


It makes a nice mitered corner. When you get to the point, put the needle down into the fabric, and turn the quilt so you can keep sewing.

Keep going all the way around the quilt.

Here’s my finished quilt.  I can’t say I’m in love with it.  I love the fabrics, but I’m a little bored with the finished product.  I guess that’s what happens when you do a project that you don’t really want to think about and can’t get out of the house to buy the supplies you are wishing for.

I did get to try my hand at machine quilting.  I made the swirly patterns in the big squares, which is something I’ve never done before.

I made two of these quilts and put them over the chairs in my family room.  They add a little color and I’m happy about that.  If you’re working on a quilt of your own, I’d love to see it.  You can email me a picture at homeiswheremystorybegins@gmail.com.

I’m linking up to a few parties.
Happy quilting!

Posted by Picasa

Share this:

  • Click to share on Facebook (Opens in new window)
  • Click to share on Twitter (Opens in new window)
  • Click to share on Pinterest (Opens in new window)
  • Click to share on Google+ (Opens in new window)

Filed Under: Miscellaneous, Sewing Tagged With: quilts, tutorial

Quilt Binding 101

July 2, 2012   By Becca 2 Comments

Last winter, when we were snowed in for a few days, I decided to get to work on a quilt.  The fabric had been sitting on my sewing table for quite a while and I really had no plans for it, so a quilt seemed like a good choice.  I wanted something simple and mindless.  I wasn’t in the mood to think too hard about measurements and fabric placement.  I just wanted to sew.  I came up with a VERY simple quilt top, which I figured I’d try free motion quilting on.  I wasn’t too excited about the free motion quilting part of that idea, so the quilt tops sat there for about half of the year.  Last week I decided it was time to get these quilts out of the craft room and into the family room.  While I was at it, I took pictures of the quilt binding process.

If you’ve ever wanted to learn to bind a quilt, here’s the step by step tutorial.  If you really don’t care, please don’t waste your time reading this, because it’s very picture heavy.

I use 2 1/2 inch strips when I make quilt bindings.  I use a cutting mat, rotary cutter, and quilting ruler to make sure my strips are perfect.


Once the strips are cut, it’s time to join them together.  I place two pieces (right sides together) and sew from corner to corner.  I overlapped a little on the ends of each piece because I knew I’d cut that part off.  You can draw a line to follow if you’d like, but I just eyeball it.


Cut off the extra fabric.

When you open in up, it looks like this.  Press the seams to one side and then keep adding more strips in the same way.

Next, you need to iron your fabric.  In the past I would fold my fabric, wrong sides together, finger press it down, and then iron it.  It’s not hard and it’s not too time consuming, but then I spotted this cool contraption on a quilting show on PBS. (There I go again, admitting that I spend my spare time watching sewing shows on public television. Nerd alert!)  This is a binding maker from Singer.  It is so cool! It folds, presses, and spits out perfect quilt binding in about 2 minutes. 


It comes out of the machine perfectly pressed.  That little piece on the end is the iron. It has a little roller in it so everything is automatic.  If you sew, you know how cool this is!  It even makes piping, although I haven’t tried that yet.  Ok, so if you don’t have this cool machine, just fold the fabric in half and iron.  That’s the way I have made it for the past 15 years and it works just fine. 

Just one more picture of my fun new toy doing its thing.

Ok, maybe just one more.  See how it fold the fabric for you before going into the iron.  You can get that tip in other sizes too.  It’s “sew” much fun!

When you’re done pressing, you’ll have a pile of quilt binding.  Get ready to sew.

The first thing I do is trim my starting edge at an angle.

Then I open it up and fold it back.

When you close the fabric back up, it gives you a clean edge.

To start binding my quilts, I usually don’t start at a corner.  I just pick somewhere in the middle, at the bottom, and line my binding fabric up.  You’ll notice that I have the raw edge of my quilt lined up with the raw edge of my binding fabric. The over hanging fabric is my quilt batting, and you can’t see it but the backing fabric is there too.


Line the presser foot up along the edge of the fabric, backtack a few stitches and then start sewing a straight line.
 

When you get just about to the end, maybe a quarter of an inch away, backstitch about an inch.

Pull the binding fabric back on top of itself, so it folds into a 45 degree angle.

Then, fold it back on top of itself, lining the edge up with the next side you need to sew.

I know that’s kind of tricky.  Let’s try that one more time.  I’m close to the edge.


Backstitch an inch.

Fold.

Fold and line up with the new side.

Then, you can lift your presser foot, turn your quilt, and get ready to sew the next side.
 

When you get to the end, turn the fabric under again, like you did at the beginning.  That gives it a nice clean edge.


Finish sewing the binding down. 

Hey, look at that!  Someone got a pretty new cutting mat!  I really needed a new cutting mat and found this one in red.  I’ve never seen a red cutting mat before, but I’m loving it!

I use my ruler and rotary cutter to remove the extra batting and backing fabric.  I line the quilt ruler up along the edge of the binding fabric and cut.  This still leaves that 1/4 inch seam allowance.  Don’t cut that off, because it’s what makes the binding fluffly.

When you’re done trimming, the quilt will look like this.


Flip the quilt to the back side, roll the fabric around the edge and pin.  I really hate pinning, so I only do it when I really have to.  The first couple of times you bind a quilt, you’ll want to pin.  After that, just hold it with your fingers and go for it.

When you are sewing the binding down, you want to get REALLY close to the edge.  See how my needle is right next to the edge of the binding fabric.  I want to go right along that edge.  It takes some practice.
 

When you get to a corner, you’ll need to fold the fabric.


It makes a nice mitered corner. When you get to the point, put the needle down into the fabric, and turn the quilt so you can keep sewing.

Keep going all the way around the quilt.

Here’s my finished quilt.  I can’t say I’m in love with it.  I love the fabrics, but I’m a little bored with the finished product.  I guess that’s what happens when you do a project that you don’t really want to think about and can’t get out of the house to buy the supplies you are wishing for.

I did get to try my hand at machine quilting.  I made the swirly patterns in the big squares, which is something I’ve never done before.

I made two of these quilts and put them over the chairs in my family room.  They add a little color and I’m happy about that.  If you’re working on a quilt of your own, I’d love to see it.  You can email me a picture at homeiswheremystorybegins@gmail.com.


Happy quilting!
Posted by Picasa

Share this:

  • Click to share on Facebook (Opens in new window)
  • Click to share on Twitter (Opens in new window)
  • Click to share on Pinterest (Opens in new window)
  • Click to share on Google+ (Opens in new window)

Filed Under: Miscellaneous, Sewing Tagged With: quilts, tutorial

Camera Strap Cover, Sewing Tutorial

January 2, 2012   By Becca 6 Comments

I promised a tutorial on how to make a camera strap cover, so here it is!  This is probably the easiest sewing project ever.  If you can sew a straight line, then you can make this.

Let me start by saying that I have a standard Canon camera strap.  It’s just the basic strap that came with the camera.  Depending on your camera strap, you may have to adjust the length or width of your pieces of fabric. 

I chose two complementary fabrics.  One fabric will be for the inside of the strap and one fabric will be for the outside of the strap.  I also bought some fusible fleece, to add a little structure and padding.  Fusible fleece is just what the name says.  It’s fleece that is fusible on one side.  It feels a little rough on the fusible side, and it’s easy to tell which is which. 

Cut 1 piece, from the main fabric, that measures 2 1/2″ x 25 1/2″.
Cut 1 piece, from the complementary fabric, that measures 2 1/2″ x 25 1/2″.
Cut 1 piece, from the fusible fleece, that measures 2 1/2″ x 24 1/4″.  (Note:  I cut my fleece 1 1/4″ shorter than my fabrics.  If you are using a different length strap, just subtract this amount from your length.)

Fold the ends of the fabric pieces over 1/4 inch and press.  Only press the short ends of the fabric.  I sewed  these ends down, once they were pressed.  You could use a zigzag stitch, two parallel lines, or a decorative stitch.  I chose to do two parallel lines.

Then, you’re ready to add your fusible fleece.  Take the fabric that you want for the inside of the camera strap and lay it face down (wrong side up) on the ironing board.  Lay the rough side of the fusible fleece onto the fabric.  Follow the directions that came with your fusible fleece.  Mine said to iron on the fabric, not the fleece, so I needed to flip the entire piece over once I had it centered the way I wanted. (Remember, you cut your fleece slightly shorter than the other pieces.)

Here, you can see that I flipped the fabric/fleece and I’m ironing on the right side of the fabric.  The fleece is underneath.

Now, you’re ready to pin and sew.  There are very few projects that I actually take the time to pin  This is one project that I needed to pin.  I just didn’t want anything to shift as I was sewing.  Place the two pieces of camera straps RIGHT sides together.  Your fusible fleece will now be attached to one of your pieces.  RIGHT sides together means that the pretty sides of the fabrics are facing each other. Using a 1/4″ seam allowance and a straight stitch, stitch down the long edges of the camera strap.

Ok, here comes the hardest part of the whole project.  Your fabric will be sewn into a tube, open at both of the short ends.  You need to turn the fabric so the pretty sides are on the outside.

Once you get it turned, press it and get ready for the last step.  To give the camera strap a more finished look, I used a straight stitch and ran all the way down the length of the strap.  I used a 1/16″ seam allowance, and did this down both sides.  I like the look of a contrasting thread, so I used white thread.

In this picture, you can see the two parallel lines, across the short ends, that I sewed in a previous step.  You can also see the straight stitch down the left side of the camera strap.  The 1/16th seam allowance is really tiny, but just sew slowly and it’ll be great!

Just like that, you’re all done!  I’ve made a couple of these straps now and have one suggestion if you are new to sewing.  If you are not confident in precise rotary cutting or perfectly straight stitching, I’d cut your pieces slightly bigger.  (Maybe 1/16″ or 1/8″ bigger.)  I’d hate for you to get finished with your camera strap cover, only to find that you can’t actually fit your camera strap inside of it!

 I hope you’ll give this project a try!  Let me know if you do!

Happy sewing!

Linking to these fabulous parties!

One Artsy Mama

Share this:

  • Click to share on Facebook (Opens in new window)
  • Click to share on Twitter (Opens in new window)
  • Click to share on Pinterest (Opens in new window)
  • Click to share on Google+ (Opens in new window)

Filed Under: Miscellaneous, Sewing Tagged With: tutorial

Welcome

Hello, Friends. I'm Becca. I'm a teacher, and when I'm not in the classroom, I'm doing everything I can to create a happy home. I love to cook, bake, garden, sew, quilt, teach, and simply spend time with my family. I don't consider myself to be an artist, but I strive to find the art in the everyday things I do to make our house a home. Join me as I quilt you up some comfort or warm you with some cookies!

Connect

youtubegoogleplusinstagrampinteresttwitterfacebooketsyemail tpt icon for blog

Search This Blog

Archives

Categories

  • Baking
  • Cooking
  • Decorating
  • Garden
  • hobbies
  • Home and Family Friday
  • Kids
  • Miscellaneous
  • Organization
  • Outdoor
  • Parties
  • Photography
  • Sewing

My Family

Copyright © 2021 · Migrate with Fabulous Blogging · Log in