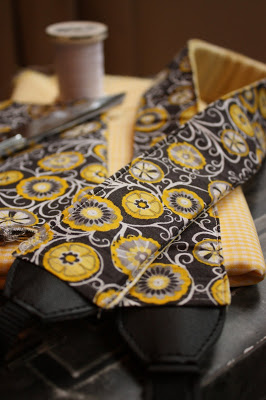
I promised a tutorial on how to make a camera strap cover, so here it is! This is probably the easiest sewing project ever. If you can sew a straight line, then you can make this.
Let me start by saying that I have a standard Canon camera strap. It’s just the basic strap that came with the camera. Depending on your camera strap, you may have to adjust the length or width of your pieces of fabric.
I chose two complementary fabrics. One fabric will be for the inside of the strap and one fabric will be for the outside of the strap. I also bought some fusible fleece, to add a little structure and padding. Fusible fleece is just what the name says. It’s fleece that is fusible on one side. It feels a little rough on the fusible side, and it’s easy to tell which is which.
Cut 1 piece, from the main fabric, that measures 2 1/2″ x 25 1/2″.
Cut 1 piece, from the complementary fabric, that measures 2 1/2″ x 25 1/2″.
Cut 1 piece, from the fusible fleece, that measures 2 1/2″ x 24 1/4″. (Note: I cut my fleece 1 1/4″ shorter than my fabrics. If you are using a different length strap, just subtract this amount from your length.)
Fold the ends of the fabric pieces over 1/4 inch and press. Only press the short ends of the fabric. I sewed these ends down, once they were pressed. You could use a zigzag stitch, two parallel lines, or a decorative stitch. I chose to do two parallel lines.
Then, you’re ready to add your fusible fleece. Take the fabric that you want for the inside of the camera strap and lay it face down (wrong side up) on the ironing board. Lay the rough side of the fusible fleece onto the fabric. Follow the directions that came with your fusible fleece. Mine said to iron on the fabric, not the fleece, so I needed to flip the entire piece over once I had it centered the way I wanted. (Remember, you cut your fleece slightly shorter than the other pieces.)
Here, you can see that I flipped the fabric/fleece and I’m ironing on the right side of the fabric. The fleece is underneath.
Now, you’re ready to pin and sew. There are very few projects that I actually take the time to pin This is one project that I needed to pin. I just didn’t want anything to shift as I was sewing. Place the two pieces of camera straps RIGHT sides together. Your fusible fleece will now be attached to one of your pieces. RIGHT sides together means that the pretty sides of the fabrics are facing each other. Using a 1/4″ seam allowance and a straight stitch, stitch down the long edges of the camera strap.
Ok, here comes the hardest part of the whole project. Your fabric will be sewn into a tube, open at both of the short ends. You need to turn the fabric so the pretty sides are on the outside.
Once you get it turned, press it and get ready for the last step. To give the camera strap a more finished look, I used a straight stitch and ran all the way down the length of the strap. I used a 1/16″ seam allowance, and did this down both sides. I like the look of a contrasting thread, so I used white thread.
In this picture, you can see the two parallel lines, across the short ends, that I sewed in a previous step. You can also see the straight stitch down the left side of the camera strap. The 1/16th seam allowance is really tiny, but just sew slowly and it’ll be great!
Just like that, you’re all done! I’ve made a couple of these straps now and have one suggestion if you are new to sewing. If you are not confident in precise rotary cutting or perfectly straight stitching, I’d cut your pieces slightly bigger. (Maybe 1/16″ or 1/8″ bigger.) I’d hate for you to get finished with your camera strap cover, only to find that you can’t actually fit your camera strap inside of it!
I hope you’ll give this project a try! Let me know if you do!
Linking to these fabulous parties!


The Comments
Lianne
Beautiful fabric and such a good craft project idea for photography enthusiasts.
rebecca
SO cute Becca! 🙂 thanks for linking up this week! Wishing you a happy new year! 🙂
Sarah
LOVE this project! Just got a new sewing machine AND camera – so what a perfect thing to stumble upon. Thanks for sharing 🙂
Peanut's peanuts
Thanks for this easy tutorial. I made a girlie style strap today. You can check it out here: http://pnutspnuts.blogspot.de/2012/05/kamera-tragegurt.html
Thank you! Greetings from Hamburg, Germany!
Anonymous
I just bought a Nikon 3100- as soon as I wore it around my neck for about 30 minutes, my excitement turned to dread. I am going to try to make my strap more comfy, thanks to your tutorial!!
Jol Kona
This was very nice and easy tutorial…..i will definitely make one for my Canon 60D 😀
thank you for showing this. 🙂
Greeting from Dhaka, Bangladesh!