In my opinion, there are several different types of quilters. There are people who like to find a pattern, pick their fabric, and then follow the instructions. Some people like to fly by the seat of their pants and buy pretty fabric and then just start sewing. There are also quilters with an eye for design. They find beautiful fabrics, get inspired, and draft out their own pattern. I tend to be a follow-the-instructions type of quilter. Flying by the seat of my pants is just way too uncomfortable for me. I’ve tried it, and I just don’t like it. I tend to freeze and then my quilting project ends up looking really pathetic.
I’ve always admired people who can design their own patterns, figuring the yardage they need, keeping seam allowance in mind, and always creating with an artists’ eye. Over the past few months, I’ve been trying my hand at designing quilt patterns. Although I don’t think I will EVER have an artists’ eye, I’ve certainly been having a lot of fun creating. I’ve been buying fabric, or using fabric I already own, and then designing from there.
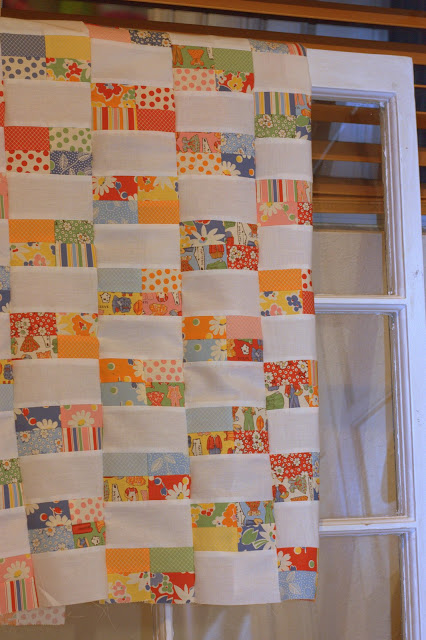
Last week I showed this quilt top to you.
I had purchased this Honeybun from the Moda line and really didn’t know how I wanted to use it.

It sat on my shelf for a really long time, because as much as I loved the fabric, I just didn’t know what I wanted to do and I didn’t want to waste it or start something and make a mistake. Well, I finally got inspired. I found a Jellyroll pattern that I liked. I knew it would be slightly different, by using a Honeybun, so I needed to plan it out. (Remember, a Honeybun is a smaller version of a Jellyroll.)
Here’s the picture I created to help me wrap my head around the way I wanted it to turn out.
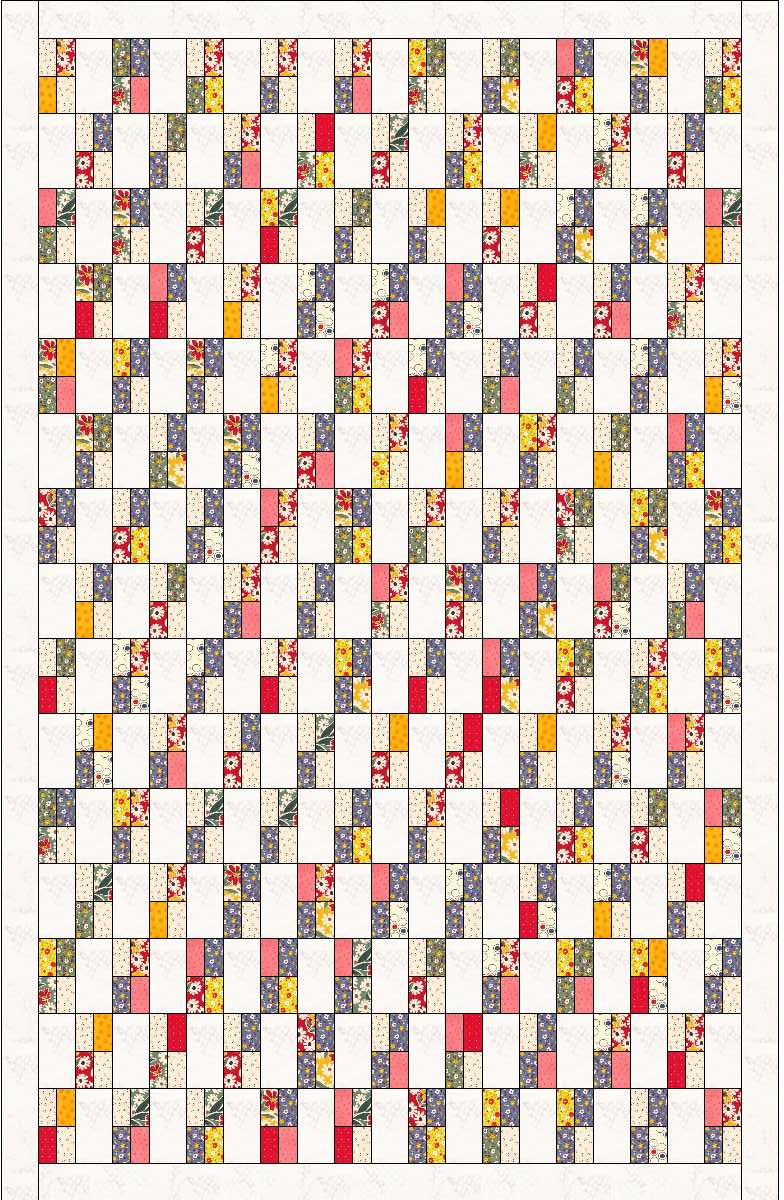
To make this quilt, you need one Honeybun and 1 5/8 of a yard of light fabric.
I started by sewing the Honeybun strips together, in pairs.
Then, I cut the strips into 2 1/2 inch blocks.
By sewing the 2 1/2 inch block to another 2 1/2 inch block, I got the little “block of four”.
Finally, it was time to sew the blocks to white rectangles (2 x 4 1/2 inch rectangles).
It always makes me happy to sew the strips together because the quilt finishes up so quickly. A little 2 1/2 inch border on the edge and the quilt top was complete.
It looks like a lot of work, but because I used the strip piecing method, it actually came together very quickly.
Happy quilting!
Here are a few linky parties I like to participate in.

The Comments
Crystal
Beautiful! Great job!
SlimKatie
I always see those rolls and wonder what the heck people do with them… that looks fantastic!!